Pages

.

Chocolate Agnolotti


Only a few days left before I leave and things are getting hectic. As soon as I finish this I'm going to run some last minute errands and then figure out how I'm going to manage the Little Humble's entertainment on one of the longest flights we've taken her on to date.

I see from the poll I posted a few days ago that most folks are okay with me blogging about my trip so I'll do that in addition to posting the pies for the NSHP pie contest. I'll try to keep things fairly food oriented, just so things don't deviate too far from the food-blogger norm.

To those who answered "Trip?" on the poll: Mr. Humble, the Little Humble and I be visiting my mother in London for a couple weeks. My family and I will also be taking a few brief side trips with my mother and her husband to Scotland and Morocco.

Yes, there will be haggis.

I see one person selected the option indicating that regardless of what I post, they want to stab me with a butter knife... interesting. Well, I'm surprised it was just one out of a hundred. I really thought I was more irritating than that.


So today's treat is quick and simple. I would tag it as "easy" but it does involve frying which I realize terrifies some folks.

I have always been a fan of fried ravioli (agnolotti is simply a half moon shaped ravioli), and they only get better when the savory filling is swapped for something sweet.

These chocolate agnolotti remind me a little of a warm adult version of Hostess Pudding pies. I've not seen them for years, but I was very fond of them as a kid (yes, I'm a child of the '80s). They make a sinful breakfast, or an impressive yet easy dessert. They would be lovely dunked into, or drizzled with, some sort of decadent sauce. Something I considered whipping up this morning, but I'm a bit crunched for time and I desperately need to de-chocolate the little Humble, who went to town on these little pastries.


Not So Humble Chocolate Agnolotti

filling
1/2 cup (82g) bittersweet chocolate, chopped
2 teaspoons unsalted butter
3 tablespoons heavy cream

pastry
1 1/2 cups all purpose flour
2 tablespoons unsalted butter, melted
1 tablespoon granulated sugar
pinch salt
1/2 cup cold water

oil for frying

To make the filling, combine the chocolate, cream and butter in a heat-safe bowl. Place the bowl over a pan of simmering water and stir until smooth and combined.

Place the chocolate mixture into the refrigerator to chill until firm. This makes it easier to work with. It isn't absolutely necessary though, being in a rush this morning I allowed mine to cool for 30 minutes (until it had thickened) and then filled my pastry.

To make the pastry, combine the flour, sugar, salt and melted butter in a bowl. Use your hands to mix the butter with the dry ingredients, then add the water. Use just enough to make the dough come together in a ball (if it is crumbly, you may need more than half a cup, so feel free to add a little more). Kneed the dough with your hands in the bowl for 3-4 minutes until smooth.

Allow the dough to rest lightly covered for 10 minutes.

Roll the dough out into a thin (1/8" thick) sheet and then cut 5-6" wide ribbons from the dough.

Fold each ribbon in half, to create a crease along the length of the dough.

Using this crease as your guide, drop teaspoons of the chocolate filling on one side of the crease (you'll be folding the other side over to cover the chocolate), leaving about 1.5-2" of space in between.

Fold the dough over to cover the filling and press firmly to seal. Using a round cutter, cut out the agnolotti from the ribbon. Set aside in a single layer to await frying. Repeat with all the remaining dough and filling.

(The agnolotti can be frozen at this point and stored for future use. Simply arrange them in a single layer on a sheet pan and pop into the freezer until frozen, then toss them into a ziplock bag. No need to defrost before frying.)


When ready to fry, pour roughly one and a half inches of oil into a heavy bottomed pan and place over medium heat. Once the oil is hot, fry the agnolotti in batches until golden brown, draining on paper towels.

Serve warm with a generous dusting of powdered sugar.


reade more... Résuméabuiyad

Sour Cream Lemon Muffins


Deciding what to cook this week has been tough. You see I gave up grocery shopping a week ago, deciding to cook with what I have on hand. I'm forcing myself to clear out my refrigerator a bit before I leave on my trip.

Of course the pre-travel grocery ban complicates my general household cooking and food blogging: "What can I make with 3 dozen eggs, a huge hunk of Swiss cheese and a bunch of celery?!"

So I'll be baking with my most perishable ingredients (dairy, eggs, produce) this week. Anything that will be hairy, rancid or capable of launching itself at me when I return home in June. Just the sort of ingredients used in today's sour cream lemon muffins.


They're a moist, cakey and simple to make muffin (one bowl!), with a delicate lemon flavor. They're not tart or overpowering, despite all the zest, juice and extract used. They make a nice breakfast with a hot cup of canarino.


Perfect for the busy Mr. Humble, who can't manage to assemble even cold cereal in the morning.

Sour Cream Lemon Muffins

yields 6 jumbo muffins or a dozen standard muffins

2 cups (282g) all-purpose flour
1/2 cup (102g) granulated sugar
1 1/4 teaspoon baking powder
1 teaspoon baking soda
1/4 teaspoon salt
zest of one large lemon, finely grated
1 1/4 cup sour cream (250g)
2 large eggs
5 tablespoons (75g) unsalted butter, melted
1/4 cup (55g) fresh lemon juice
1 teaspoon lemon extract (or 1/4 teaspoon lemon oil)

coarse sugar for sprinkling (optional)

Prep your muffin pan with a little non-stick spray and preheat the oven to 375°F.

In a large mixing bowl, combine the flour, sugar, baking powder, baking soda, salt and lemon zest. Use a whisk to break up any lumps and thoroughly combine. Make a well in the center of the dry ingredients and add the sour cream, eggs, butter, lemon juice, and lemon extract.


Mix together with the whisk quickly until the batter is moist but combined. It shouldn't take more than 30 seconds or 20 strokes. Expect the batter to be thick and a little lumpy. If it seems overly thick (there will be some variation in moisture content between sour creams) feel free to add a splash more lemon juice.

Divide the batter between the wells in your muffin pan (roughly 3/4 full) and sprinkle with coarse sugar, if desired.

Bake for 16-24 minutes (depending on the size of your muffin) until the muffins are light golden brown on top and a toothpick comes out clean. Do not over bake.

Allow the muffins to sit in their tins on a wire rack for 5 minutes to cool. Then tap them out of the pan.

Serve slightly warm or at room temperature.


In other news, this is the last week to get your pies in for the Not So Humble Pie Contest next week. I'll be confirming all the entrants via email this weekend, so keep an eye out for an email from me if you submitted a pie. (Edit: Due to a very busy weekend, I'll be doing the confirmations on Monday the 17th)

Also, for those folks out there who just can't get enough lemony desserts check out Food-ology and Kitchen Koala. They've been filling my blogger-feed with some seriously tempting lemon desserts this week. Nom.
reade more... Résuméabuiyad

Fresh Mint Truffle Tart


My mint is back...

Last year I filled three enormous bags with the plant, pulling up as many of the stolons from earth as I could find. Yet it comes back... every year.

The plant and I have an tense relationship. It wants world domination, spreading its shoots up all over my yard and beyond. I just want it to give up a few leaves now and then, play nice in the yard and leave the rhododendrons alone.

Being a stubborn, willful plant, it won't comply. So, I have to go out there and show Mr. Mint who is boss now and again.


Like today.

Who is tough now, eh plant!

So, rich with plenty of fresh mint, I decided to make a truffle tart this morning. A crisp chocolate crust filled with a bittersweet ganache infused with my pesky plant.


Not So Humble Fresh Mint Truffle Tart

serves 12-16 (small pieces, it's rich)

crust
1/2 cup (65g) powdered (icing) sugar
1 cup (138g) all-purpose flour
1/4 cup (21g) dutch processed cocoa
1/4 teaspoon salt
1/2 cup (1 stick, 113g) unsalted butter, cold

filling
1lb 1 ounce (477g) semi-sweet chocolate (56% cacao), chopped
1 1/4 cup (290g) heavy cream
2 tablespoons unsalted butter
40 fresh mint leaves

garnish (optional)

melted chocolate
mint leaves

Pre-heat your oven to 350°F.

In your food processor, pulse together the dry ingredients for the crust. Cut the cold butter into small pieces and add those to the food processor. Blend the mixture until it forms a fine crumb that holds together when pinched.

Pour the crumbs into an 11" tart pan with a removable bottom and press into the pan to form the crust.


Bake the crust for 15 minutes and then allow to cool completely on a wire rack.

While that cools you can start the tart's filling.


Pick roughly 40 mint leaves and give them a good washing. Unless, you know, you like infusing your ganache with extra 'vitamins' and 'minerals'.

Thoroughly dry the leaves in paper towels and then give them a couple smacks with your rolling pin. No need to muddle or pulverize the leaves, just one or two smacks to make them fragrant.

Bring the heavy cream to a simmer over medium heat. Remove the pan from heat and stir in the mint leaves. Cover and allow to stand for 20-30 minutes so the mint can infuse the cream.


In the meantime go about chopping all that chocolate.

When the cream is ready, strain to remove the mint leaves and add the cream, the butter and the chocolate to a heat-safe bowl and place over a pan of gently simmering water (over, not in). Stir the mixture slowly, until completely smooth. The end result should be a glossy, emulsified ganache, fragrant with real mint.


Pour the ganache into your cooled crust and then place into the refrigerator to set. It should take a few hours to firm up.


While you're waiting on the tart, you can make some chocolate leaves to decorate the tart.

Simply melt a little chocolate and take a small paintbrush (the cheap ones with plastic bristles, usually marketed towards children work the best for this) and paint a thick coating of chocolate onto the underside of the leaf, avoiding the edges.

Place your leaves onto a baking sheet and then pop the baking sheet into the freezer for 5 minutes.

Once the chocolate is firm and no longer glossy, you can gently peel away the mint leaf. Keep the chocolate leaves chilled until ready to use. Once the tart has set, you can arrange the leaves on top to garnish.


You can also garnish the tart with a little fresh mint or a dusting of cocoa powder before serving.

To store, keep the tart covered and chilled for up to 3-4 days. Allow to stand at room temperature for about 5 minutes before cutting and serving.

Cut a slice, a very small slice, and enjoy.
reade more... Résuméabuiyad

Linzertorte


A happy Monday and belated Mother's Day to everyone.

It has been pretty hectic around here these last few days. Both Mother Humble and Sister Humble are in town visiting. My mother caught a plane back to London last night and I finally have my kitchen to myself again. Which is welcome, as I've gotten absolutely no baking done these past few days. Not even for Mr. Humble's birthday which was on Sunday (he had to share his day with moms this year, poor guy), I was just been too busy assisting Mother Humble's various cooking projects.

Cooking with my mother was pretty normal. Normal being occasionally surreal and bizarre.

Sunday I'm doing lunch prep while she grills me regarding the whereabouts of her knickers (that's me dainty trying to avoid the term underpants).

Now, I'm always guilty of stealing some article of clothing from my mother during her visits (nice yellow cardigan, mom), as we are roughly the same size. However, I do draw the line somewhere.

I, Ms. Humble, am so not interested in those knickers.

Of course, she is absolutely convinced I have them and am wearing them as I do prep work, which makes for an interesting kitchen work environment.

Later during the mother's day lunch, with the family present, she announces she'll pay $20 to anyone who can find her knickers.

...

Yup.

That was basically my weekend.

So this torte...


Trying out yet another recipe for this classic.

I really like linzertortes, they are such an easy tart to throw together. Make a little dough, add some homemade jam and you're basically done. The tart offers up the lovely warm and fuzzy combination of fruit with the flavors of cinnamon, cloves and citrus. The once ordinary raspberry jam filling takes on a hint of mulling spice. Nom.

Crunched for a Monday post, this tart fits the bill. Quick and easy. Well, apart from my botched weaving of the lattice--which I discovered is near impossible with this somewhat crumbly pastry.


Linzertorte

adapted from The Williams-Sonoma Baking Book
yields one 9" tart (serves 8)

1 1/2 cups (200g) all purpose flour
1/4 teaspoon ground cinnamon
1/8 teaspoon ground cloves
1/4 teaspoon salt
1 tablespoon lemon zest (roughly one medium lemon)
1 cup (155g) whole, unblanched almonds
1 cup (125g) confectioners (icing) sugar
3/4 cup (170g) unsalted butter, room temperature
3 large egg yolks
1 1/2 - 2 cups (500g) raspberry jam
1 tablespoon whole milk

Confectioners sugar or coarse sanding sugar

In a bowl, sift together the flour, cinnamon, cloves, and salt. Add the lemon zest and set aside.

In your food processor, grind the almonds and confectioners sugar until fine.

In your stand mixer, using the paddle attachment, beat the butter until soft and creamy. Add the almond mixture and mix on medium low to combine. Add two of the egg yolks, blend and reduce the mixer's speed to low. Add the flour/spice mixture and beat until just combined.

Place roughly two thirds of the dough into a 9" tart pan with a removable bottom. Wrap the remaining third of the dough in plastic, flattened like a pancake, and chill in the refrigerator.

Press the dough into your tart pan, creating an even layer for the crust. Fill the tart with a layer of jam. If the jam is difficult to spread, warm in the microwave for a few seconds and then attempt to fill the tart.

Remove the slab of dough from the refrigerator and roll it out on a lightly floured surface into a 10" circle. Using a fluted pastry cutter (or ravioli cutter), cut the disk into strips. If you don't have a pastry cutter a pizza wheel or sharp knife works just fine.

Lay the dough strips across the torte to create the lattice. While I attempted to create a fancy braided lattice, this failed miserably. The dough is just too delicate to handle weaving so I recommend one just laying down half the strips and then top them diagonally with the remaining strips.

Press the strips into the edge of the crust, trimming any excess.

Place the torte into the freezer for twenty minutes.

Pre-heat the oven to 350°F(180°C).

Before baking, whisk together the remaining egg yolk with the milk. Brush the crust and lattice with the egg wash. If desired, sprinkle the crust with coarse sanding sugar (you can skip this if you wish to sprinkle it with confectioners sugar before serving).

Bake for 45-55 minutes, until the crust has browned and the jam is bubbling.

Cool on a wire rack.

Serve with or without a dusting of confectioners sugar.

reade more... Résuméabuiyad

Sourdough Cinnamon Rolls


I'll try to keep this post brief today (HA!). Mother Humble is arriving tonight and that means I need to get the house in order. It also means I need to hide any food I don't want her to swipe for the gigantic cooking projects she tends to undertake during her visits.

Anyway, so despite the near constant bread baking around here, I have yet to post a single sourdough recipe on the blog. This has everything to do with Mr. Humble's deciding he is the 'artisan' bread maker around here and his completely taking over the job of supplying the household with bread. However, I was able to commandeer a bit of the sourdough starter this week and start the process of creating sourdough cinnamon rolls.


I found a recipe on The Fresh Loaf that sounded great. I love really soft, tender cinnamon rolls. So when I'm hunting for a recipe, I look for heavily enriched doughs (woohoo butter!). This one delivers and has additional tenderizing ingredients (eggs, mashed potato and of course, wild yeast) so I was expecting a super soft billowy roll.

They were. Oh yes.


The catch... they took days to make. DAYS. Spanning thirty-six hours, to be exact.

I'm not the most patient baker. I understand that delicious things happen when dough cold ferments for extended periods and that waiting is usually rewarded, but I'm not sure I can handle making these again. They just took soooo long. Mr. Humble doesn't agree, he loved them and promised to make the dough for me whenever I had the urge to bake cinnamon rolls. Not that it will do anything to relieve my impatience...

Still, if you're looking to make sourdough cinnamon roll and happen to be in absolutely no rush, this is a good recipe.


Sourdough Cinnamon Rolls
by Mountaindog @ The Fresh Loaf
yields 12 large rolls

Levain
150 grams 100% hydration sourdough starter, recently fed and ripened (when it has just doubled it's volume is a excellent time to use it)
340 grams lukewarm water
340 grams all-purpose flour

Let this mixture sit at room temperature for 12 hours, until doubled (usually overnight.) If your starter tends to double in less than 12 hours or you're not going to make the final dough for a while, then keep the levain in the fridge until you're ready to make the dough.


Final Dough
113 grams (1 stick) unsalted butter, softened
225 grams 3 large eggs
42 grams (1 1/2 tablespoons) honey
24 grams (2 tablespoons) pure vanilla Extract
130 grams mashed potato (I recommend Yukon Gold)
195 grams (3/4 cup) buttermilk or whole milk
850 grams levain
700 grams all-purpose flour
21 grams salt

In your stand mixer with the paddle attachment, cream the butter then beat in the eggs, honey, vanilla and mashed potatoes. Scrape down the sides of the bowl and mix until well blended.

Swap out your paddle for the dough hook and add the milk/buttermilk and levain, mixing until blended and then gradually add the flour and salt to the bowl. Continue mixing with the hook until well-blended, scraping down the sides of the bowl.

Allow the dough to rest covered in the bowl for 20 minutes.

After the rest, mix with the hook for another 2-3 minutes.

The resulting dough will be very moist and sticky.

Turn the dough out into a large, lightly-oiled bowl. Cover and allow to ferment in a cool location (55-65°F) until doubled (this should take 8-12 hours, depending on how warm the location is). Every 4-6 hours, lift the dough to stretch and then fold it onto itself.

Towards the end of the fermentation you can ready the filling:

Filling

double the dry ingredients for extra coverage/fun

170 grams (1 1/2 sticks) unsalted butter, melted.
85 grams cream or half & half
300 grams dark brown sugar
180 grams raisins (I omitted these because I consider them a blight on cinnamon rolls)
3 grams (1 1/2 teaspoons) cinnamon
12 grams (1 tablespoon) vanilla extract

Combine the melted butter, vanilla and cream. In another bowl combine the sugar, cinnamon and raisins.

Once the dough has finished the ferment, you can roll it out and fill.


Since the dough is so sticky, I highly recommend using a well-floured baking couche. Don't have one? No need to hit a specialty store. Just visit your nearest fabric store and buy a large heavy piece of linen or canvas. Thoroughly wash it, flour it and never wash it again (if for some reason, dough sticks to your couche, let it dry and then scrape it off). It will make rolling, handling and proofing any sticky dough so much easier. The scrap of cloth happens to be one of the handiest things it my kitchen. When you're done using it, simply dust off the excess flour, fold it and stash it.

Okay, back to the rolls...

Turn out your dough onto your floured couche and dust it lightly with flour. Roll it out into a rectangle, (how large will depend on how thick you want your rolls and how many spirals of cinnamon you desire). I rolled mine a bit larger than 18"x20" ...I think.

Brush the sheet of dough with the butter/cream mixture and then sprinkle with the cinnamon and sugar.


Roll up the dough, using the couche to help roll it onto itself (I told you it was handy).

Then using a piece of floss or thread, cut the 1"-1.5" rolls from the log. Place these into a greased baking pan or casserole. Brush the rolls with a little butter and then cover. Slowly proof the rolls for 12 hours (or overnight) in a cool place (or the refrigerator) until they have doubled.


Bake straight from the fridge in a 400°F oven for 25-35 minutes (if you have very thick rolls it may take a bit longer) or until the internal temperature hits 195-200°F on instant-read thermometer.

Once out of the oven, brush the rolls with a little more melted butter to keep them soft and work on the topping.

Mountaindog provides a recipe for a cream cheese icing (you can find it here). I went with my own favorite cinnamon roll slathering glaze:


Glaze:

3 cups powdered sugar
1 tablespoon vanilla extract
1/3 cup heavy cream
whole milk

Whisk together the ingredients, adding just enough milk to make a fluid glaze that flows thickly and smoothly off the end of the whisk.

Use the whisk to drizzle the icing over the rolls and serve warm.


If you're not able to serve the rolls immediately, they'll keep for a couple days covered and refrigerated. Gently rewarm before serving.

Enjoy!


reade more... Résuméabuiyad

Science Cookie Roundup #4


Somehow April slipped by without a science cookie roundup!

How did that happen? That sneaky month just went ahead and ended on me without any warning. Time it seems, just slips by when you've got a lot going on.

Well, better late than never! Right?

Science cookie roundup #4!

This time we have so many terrific cakes that I can barely get away with calling it a "cookie roundup" but I'm going to anyway (because I can).

I baked the cookies pictured above (along with nearly 60 others) this month. I'm not going to go into detail about what they are exactly, since they're for a project that is still in the works. Still, they're my contribution to this month's round up. If you can guess what they are, geek-gold-star for you!

Let's get on to the baking nerdery...

Crissy made the following gorgeous science cake. So pretty that even if you have no idea what it depicts, you can still appreciate its handsome good looks.

"I'm currently a third year grad student focusing on cilia biology. I made this cake last year for one of my labmate's birthdays - it depicts the cross-section of a 9+2 cilium by transmission electron microscopy. I covered the cake in homemade marshmallow fondant, which I also colored and used for the design."


Kim sent me several batches of science themed baked goods, including this beautiful cake.

"The cake a bit more math-related than science, but it seemed right up your alley anyway. It is a normal white cake with basic frosting gone horribly nerdy. It was for an 80's themed birthday party, hence all the colors. Around the outside is the birthday girl's name spelled out in binary (ASCII) and in the middle is an equation for finding the probability of 2 people out of a group of n having the same birthday."

Statistics is very much up my alley. I loved it!

"One is a set of mole-shaped mole-assus cookies spelling out Avagadro's number. I made them for some nerdy boys I know in honor of Mole Day a few years back. The extra dough became some recognizable (and some not-so-recognizable) molecules."


Fellow baker and science lover Andrea made this incredible brain cake!

"Our Neuroscience Club participated in the chocolate festival here at our university so I made this brain cake. I know its not a cookie, but I think it fits right in with all of the science-food fun! Its made of 3 layers of devil's food cake, carved into the dome shape and covered with homemade dyed fondant."


Molecular Biologist Carolyn sent me these mice cookies she made for her lab.

I really find it amusing how biologists love mice cookies, but when I show a biologist a petri dish cookie the general response is: "I can't bring myself to eat that!"

Sure petri dishes smell bad but do the mice really smell much better? I'm digressing here... on to the mice cookies!

Clockwise from top left:
GFP mouse
Dorsal skin chamber with GFP tumor
Cranial window with GFP tumor
Nude mouse (cover your eyes kiddos)


Monica, a former science teacher, sent in these crayfish cookies she made for her son's class (they studied crayfish this year).


I actually have this exact cookie cutter. I used to have a couple of them but I sent one to a friend who claims to be 'allergic' to seafood. I thought it would be a good way to taunt him.

I know, I'm a great friend.

Very cute cookies, Monica.


Marta sent in an absolute wealth of engineering cookies for this month's roundup:


Ohm's law
- Fourier's law (heat conduction)
- Electromagnetic field
- Atom (a classic)
- Organigram (they have some subjects on Management)
- Circle surface (I particularly like this one. So geek).
- Reynolds' number
- Laplace transform
- Integration of the exponential function (which is equal to itself, integration has no effect. It seems to be a maths joke.)
- Feedback
- On/off button


- Binary numbers
- Electronic boards
- BJT transistor (third row, second column)
- Vector addition (third row, forth column)
- Cantilever beam (third row, fifth column)
- Two-spam beam (forth row, fourth column)


I hope I got everyone!

Ever since publishing my email address on here, I've been inundated with spam. Stock tips, male enhancement, cheap prescription drugs, deposed Nigerian royalty with lots of money in need of safe keeping, you name it.

It is making managing my daily emails a little annoying. So if you got lost in the crush and I missed you, send me an email today and I'll edit you in. If you're interested in being in the next science cookie roundup just send me an email to notsohumblepieblog@gmail.com and I'll share your baking nerdery.

If you send me a 419 scam, my bank account routing number is 3304...
reade more... Résuméabuiyad

Lollipops & Sugar Science Ramblings

A typical cloudy Pacific Northwest day,
as seen through lollipops


I've been itching for a little candy making lately. However, whenever I post candy on the blog I spend a lot of time in the comments answering questions and discussing the science behind candy making.

I told myself that the next time I made candy for NSHP, I was going to take some time to talk about sugar and the science behind candy making. So I made some lollipops last Friday, probably the simplest and cutest candy someone can make at home and wrote a post on sugar, science and lollipops.

Yum!

Well sorta. The post got totally out of hand. Epic baking nerdery.

I had to rewrite the whole thing because I was just rambling on and on about chemistry, fructose grannies, sucrose dance parties and molecular peer pressure.

It was long and well, it was a bit weird.

Okay, a lot weird.

So I rewrote it over the weekend (why Friday's post never came to be), stripping it down to the two issues that usually come up in candy making:

"My candy crystallized! What should I do differently?"


To which I usually give the stock answers of washing down the sides of the pot, don't stir after a certain point, keep seed crystals away from your syrup and use some corn syrup.

Then I get this question:

"I don't have or can't use corn syrup, what do I do?"


There are options, but it takes explaining. It can be hard to sum up in a little comment, so that is basically what I am going to write about today:

Crystallization and what alternatives are out there for folks who cannot find, or do not wish to use corn syrup.


The Basics:

When you cook a sugar syrup, the water boils away and the sugar concentrates. As the sugar concentrates the temperature increases. This is why we use temperature (not cooking time) to determine if the syrup is ready to make a batch of taffy or a batch of toffee. The higher the temperature, the more concentrated the syrup, the firmer it will set when cool.

Unfortunately, the more concentrated the sugar the higher the risk of crystallization. Eventually it will get to a point where basically all you have to do is look at it funny and BAM (channeling Emeril today it seems) you've created a batch of woefully gritty candy. Of course this is a bit of an exaggeration, but when you're dealing with a highly saturated solution it really doesn't take much.

How does one prevent this? Well this is where things can get a bit long, there are both methods and ingredients that can assist in preventing crystallization. To keep things brief we're going to stick to interfering agents (ingredients).


The common means of preventing crystallization in candy making are glucose, fructose and fats.

Think of sucrose molecules as puzzle pieces. Pieces to the least puzzling puzzle ever, since they all align perfectly with each other. Now, glucose and fructose... well they're not part of the puzzle set and basically gets in the way of the sucrose pieces (hence the term interfering agents). The sucrose has a hard time aligning with other sucrose molecules if there is a glucose molecule between it and its sucrose buddy. In candies like caramels, butter (fat) plays a similar role.

My go-to interfering agent is glucose (corn syrup) when making candy. It is readily available in the U.S. and inexpensive (in bulk). If you're not able to buy corn syrup or don't wish to use it there are options for substitution. However it is important that your substitution be primarily composed of glucose or a mixture of glucose/fructose.

I've seen folks suggest substituting sucrose based syrups for corn syrup in candy making, however this will not fulfill corn syrup's roll in prevent crystallization. You're just adding more sucrose puzzle pieces to the mix and that will only make those crystallization crazed sugar molecules more happy.

So when choosing a substitution, read the labels and think about the chemistry.

This is a quick and dirty run down of sweeteners in various syrups. Probably inaccurate because the internet lies to me, but it will give you a rough idea of what you're dealing with.

Honey: 40% fructose, 30% glucose, 1% sucrose, 9% bee spit
Maple Syrup: primarily sucrose
Corn Syrup (not high fructose): primarily glucose
Agave Nectar: 50-90% fructose 8-20% glucose
Brown Rice Syrup: 45% maltose*, 3% glucose, 52% maltotriose* (*glucose gone wild)
Simple Syrup: primarily sucrose
Golden Syrup: roughly half fructose and glucose and half sucrose
Inverted Syrup: glucose and fructose


Not all of these sweeteners are equal when it comes to candy making. When looking for an agent to help prevent crystallization, obviously you will want to avoid sucrose as it isn't going to do much to prevent crystallization.

One will also need to be mindful of how hygroscopic (how much water it absorbs from the atmosphere) the sweetener is, depending on the candy you're making. A sweetener with a lot of fructose (which will wick moisture at even a low relative humidity) can make hard candies that can quickly become gummy and sticky. This is also why one needs to be mindful of the humidity when making candy as all sugars are hygroscopic to some degree. Unless somehow, you're working with a low hygroscopic sweetener like isomalt, you shouldn't make candy on humid days.

Of all of the syrups listed above, you can make the last of them (Invert Syrup) at home from plain ol' sugar. Meaning it it can be made by almost anyone anywhere.

So today, for this candy post I'm going to put aside my ameri-centric corn syrup and cook with the more universal inverted syrup.


Inverting Sugar:

The regular sugar (sucrose) is really just two simpler sugars linked (glucose and fructose). If you separate them, then you are creating fructose and glucose, the interfering agent needed to prevent crystallization.

There are a few ways to invert sugar:

-- Method 1: Invertase.
This is an enzyme that breaks down sucrose into an inverted sugar syrup (fructose and glucose). Those gooey chocolate covered cherries you like? Invertase. Soft creamy Junior mints, Cadbury eggs, Caramello bars? Those are invertase too. It is a little O-C(fructose) bond cleaving powerhouse and how most commercial invert sugar and gooey treats are made.

It can be difficult to find Invertase in the retail market, though specialty shops that cater to home candy makers will carry it. One can also find it online--along with practically everything else under the sun--at Amazon.
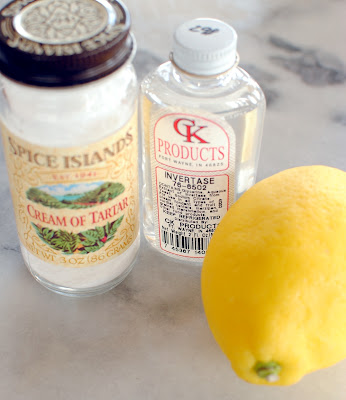

-- Method 2: Acid.
No, not 'ahhh my skin' kind of acid. The decidedly less cool types, like lemon juice, which don't produce any ahhhhh's or flailing, unless squirted into the eyes. Citric acid, ascorbic acid, potassium bitartrate (cream of tartar) are other acids that are used to accelerate the conversion of sucrose to invert sugar.

(Technically, one doesn't need any of these to create an invert sugar syrup. You can create a small amount of inverted sugar just through the process of simmering a simple sugar syrup. However it is generally done with assistance as it is far more efficient.)


I tested two batches of invert syrup, as I had never used it before in candy making and I wanted to be certain it worked. I made one batch with lemon and one with cream of tarter. They both worked well in the lollipop recipe (which happens to be a great test for these syrups as lollipops are highly prone to crystallization without an interfering agent).

Invert Sugar Syrup Recipe

2 cups (410g) sugar
1 cup (236ml) water
1/2 teaspoon lemon juice OR 1/4 teaspoon cream of tartar

Combine your ingredients in a heavy bottomed sauce pan and bring to a boil over medium heat, stirring until the sugar is dissolved. Once it boils, stop stirring and wash down the sides of the pot with a damp pastry brush to remove any crystals from the side of the pan. Allow the pot to boil undisturbed until it reaches 230°F and then remove from heat.

Allow the syrup to cool a bit and then pour into a heat safe container (mason jars or Italian caning jars work great). You can store it tightly covered in your refrigerator for up to 6 months.

Now you can make lollipops!

Lollipops are so simple. Really, you don't even need a recipe for them. They're one of the things that I just throw together in a pan just eyeballing the ingredients to make sure the ratios are roughly right. However, I probably can't get away with that kind of instruction on the blog so I'll post a recipe:


Not So Humble Lollipops
1 cup granulated sugar
1/2 cup water
1 cup invert syrup or corn syrup
food coloring and flavoring

Additional supplies: lollipop sticks and molds*, candy oils or flavoring extracts.

*You have the option of pouring the lollipops or using a lollipop mold. I have molds but I prefer the slightly irregular charm of poured lollipops. Molds do make the process easier, particularly if you don't have a perfectly level heat safe surface to pour onto. I used a very lightly oiled marble pastry slab or when needed, some space on my granite counter tops. Molds can be greased with a little nonstick spray too if you're worried about them sticking (though they usually pop out with a little flex).

(If you're using a mold, make sure it isn't a chocolate mold. Some chocolate molds look similar to hard candy molds (round, slot for a stick etc) but they cannot withstand 300°F molten sugar. If in doubt look at the color: Clear molds are usually for chocolate, opaque white molds are usually for hard candy. I'm sure there are exceptions to this rule of thumb but so far, it has worked for me.)

Combine the sugar, invert syrup (or cornsyrup), and water into a small heavy bottomed pot. Bring to a boil over medium heat stirring to dissolve the sugar. Once boiling stop stirring and wash down the sides of the pot with a damp pastry brush to remove any sugar. Clip on your candy thermometer and watch it simmer. At about 260°F add a few drops of gel food coloring to the mix, no need to stir it in, the bubbling action will take care of that. Continue to cook over medium until the temperature reads 300°F (hard crack stage) and remove from heat.

Add your flavoring now and stir it in (standing back as it may steam up a bit). For this recipe it will take roughly one dram of candy flavoring oil or a 1-2 teaspoons flavoring extract. What type of flavor will determine exactly how much (peppermint and cinnamon are generally much stronger than other flavorings).

Now pour the candy onto your prepared surface, working carefully as sugar burns are not fun. This isn't something that you should do with dogs, children, or marbles underfoot. You can either pour the lollipops onto the sticks or place the stick into the syrup after you've poured it. I prefer the latter as it creates a rounder lollipop, though it can be tricky to pour lollipops and insert the sticks (giving them a little twist to coat them) before the syrup hardens so consider recruiting an extra set of hands for this.


For the molds, insert your sticks into the slots and then pour in your candy. That's it.

Give your candy some time to cool (10-20 minutes) and then try to pop them off the surface or out of the mold (don't use the stick to pry them out). As soon as they're completely cool, individually wrap them in cellophane and tie them securely with a decorative twist tie or ribbon. This will prevent them from absorbing moisture.

They should keep a few days like this depending on the humidity.

Enjoy!

reade more... Résuméabuiyad